Converting any file into an image
Hey there, everyone. I’m super excited to share with you my latest project - a program that can turn any ordinary file into a stunning image. I mean, who wouldn’t want to do that, right?
I’ve used C++ and OpenCV to create a program that can take any file - like a text document, spreadsheet, or even an audio file - and transform it into a visual masterpiece. And the best part? It’s really simple to use. All you have to do is load your file, choose your preferred settings, and voila! You have a gorgeous image that you can use however you like.
Now, I know you might be wondering why you would want to turn a file into an image. Well, for one, it can make your work a lot more visually interesting and engaging. Plus, it can help you communicate your ideas in a more creative and impactful way.
In this blog post, I’ll be sharing more about how I created this program, how it works, and some of the ways you can use it to enhance your work. So, buckle up and get ready to discover the possibilities of this exciting new tool!
Examples
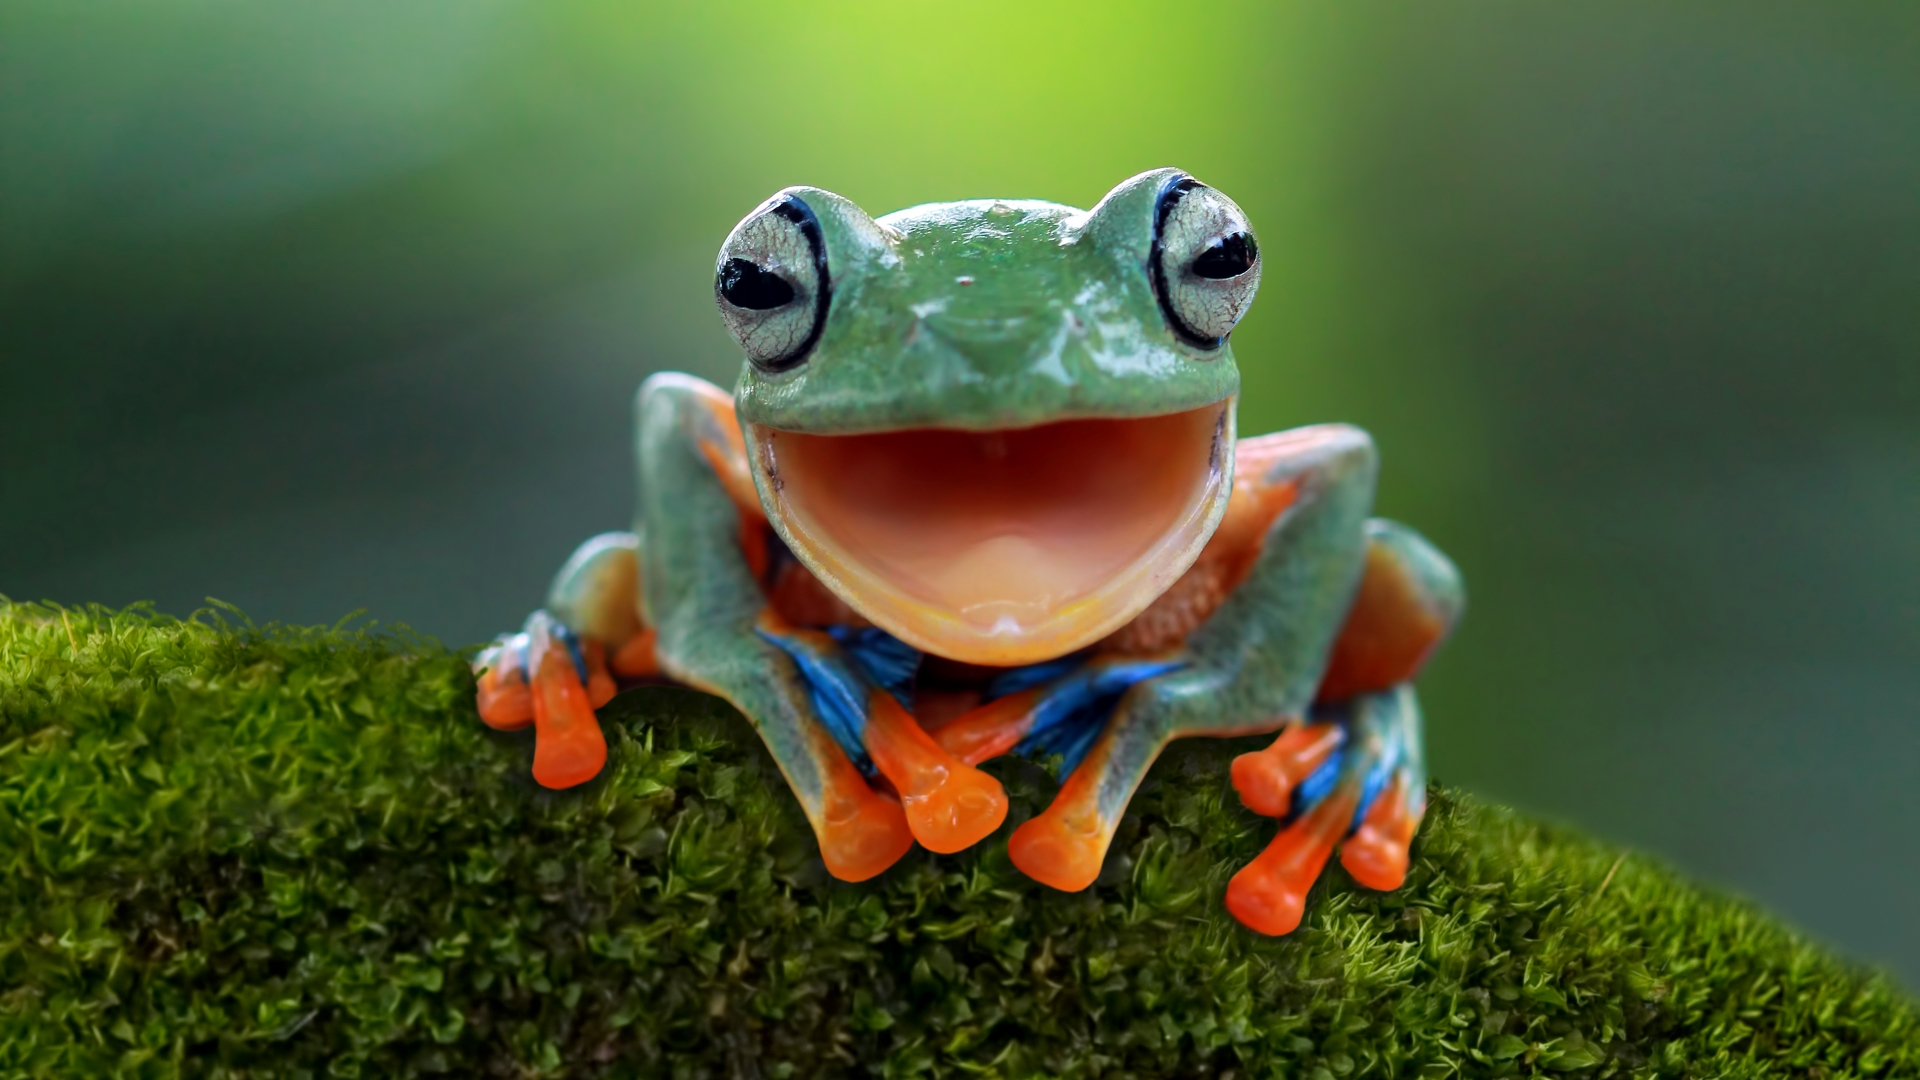
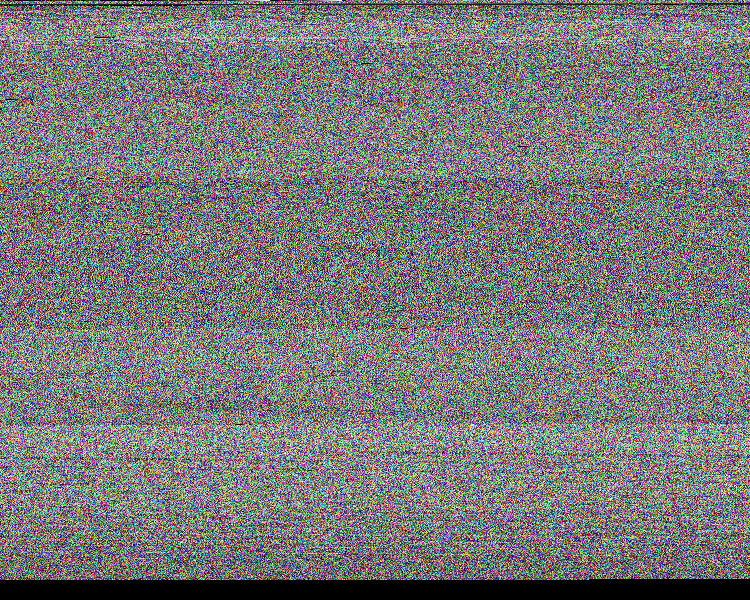
Below are two pictures showing what happens when you process an image through my program. As you see the result is quite eye-catching! Fun fact: I love frogs and therefore this picture has been my go-to test image during the project.
How to convert a file into an image?
The principle is really simple. As you probably know, a given file is built of a lot of ones and zeros. Take 8 of these and they form a byte. When reading each byte of data, I can interpret it as a numerical value between 0 and 255. This is because each byte consists of eight bits, which can be either 1 or 0, resulting in a total of 2^8 (255) possible combinations.
The values between 0 and 255 are crucial in image creation because an image is composed of numerous pixels, each of which contains three subpixels representing the primary colors of light. The range of values each subpixel can represent is from 0 to 255, enabling it to produce a wide range of colors when combined with the other two subpixels. By converting all of the bytes in a file to subpixels, I can generate a complete image that displays the bytes as colors based on their numerical values. Essentially, each subpixel is assigned a value based on a byte in the file, and the combination of all these subpixels creates the final image
How to read bytes and convert them into a pixel
Here are some code snippets showing how I created the pixels.
//Allocate memory for picture
uint8_t* buffer = (uint8_t*) malloc(size * sizeof(uint8_t));
fread(buffer, sizeof(uint8_t), size, frog);
uint8_t* index = buffer;
uint8_t byteOne = *index;
index += 1;
uint8_t byteTwo = *index;
index += 1;
uint8_t byteThree = *index;
index += 1;
loopIndex += 3;
//Set the colors (bytes)
(images[i])->at<Vec3b>(Point(col, row)) = Vec3b (byteOne, byteTwo, byteThree);Encoding information into the pixels
I quickly realized I needed to store special information about the original image in the encoded one. Information such as total bytes, surplus bits, and obviously width and height of the image. Information such as surplus bits is easy to encode in a subpixel because they never exceed the max value of an 8-bit integer. However, since width and height could exceed 255, I had to find another solution.
It is possible to store a number as big as 2^24 by storing it across three subpixels. Store the eight first byte in the first subpixel, then the second byte in the second subpixel and so on. Here’s my implementation:
void setPixels(Mat** images, uint32_t valueToEncode, uint32_t x, uint32_t y){
    uint8_t part1 = (valueToEncode >> 16) & 0xFF;  // Most significant 8 bits
    uint8_t part2 = (valueToEncode >> 8) & 0xFF;   // Middle 8 bits
    uint8_t part3 = valueToEncode & 0xFF;
    (images[0])->at<Vec3b>(Point(x,y)) = Vec3b (part1, part2, part3);
}
Bit shift a uint32_t three times to get the first, second and third 8 bits. Then write them to the image at location (x,y).
Conclusion
Overall, my project is a file-to-image converter that uses subpixels to represent the numerical values of each byte in the file. By doing so, I can create a visual representation of the file’s contents that is both unique and aesthetically pleasing. Throughout the development process, I faced various challenges, such as encoding special information, reading files and counting bytes, but I was able to overcome these obstacles with creative solutions. In the end, I am proud of what I have achieved and believe that my program has the potential to be a useful tool for anyone who wants to explore the visual possibilities of file encoding.
Want to read more of my code? Check out the project on my Github.